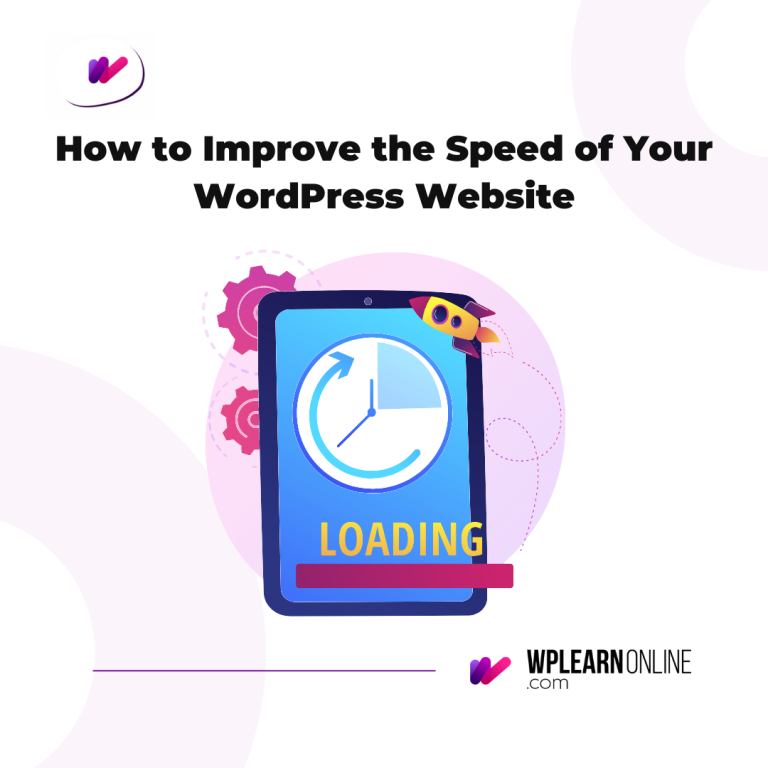
Introduction
In today’s digital age, websites are an integral part of businesses and our day-to-day activities as individuals. However, having just any website is not enough in today’s modern world, you should have a fast and secure website. If you own a website, you probably already know the importance of website speed, security, and performance. A slow website can lead to a frustrating user experience, decreased page views, and also negatively impact your search engine rankings. One easy way to improve the speed, security, and overall performance of your website is to use a Content Delivery Network (CDN). At the end of this article, you will understand what CDNs are, how they work, and how to integrate Cloudflare, a free and reliable CDN, with your WordPress Website.
What are CDNs and How do they Work?
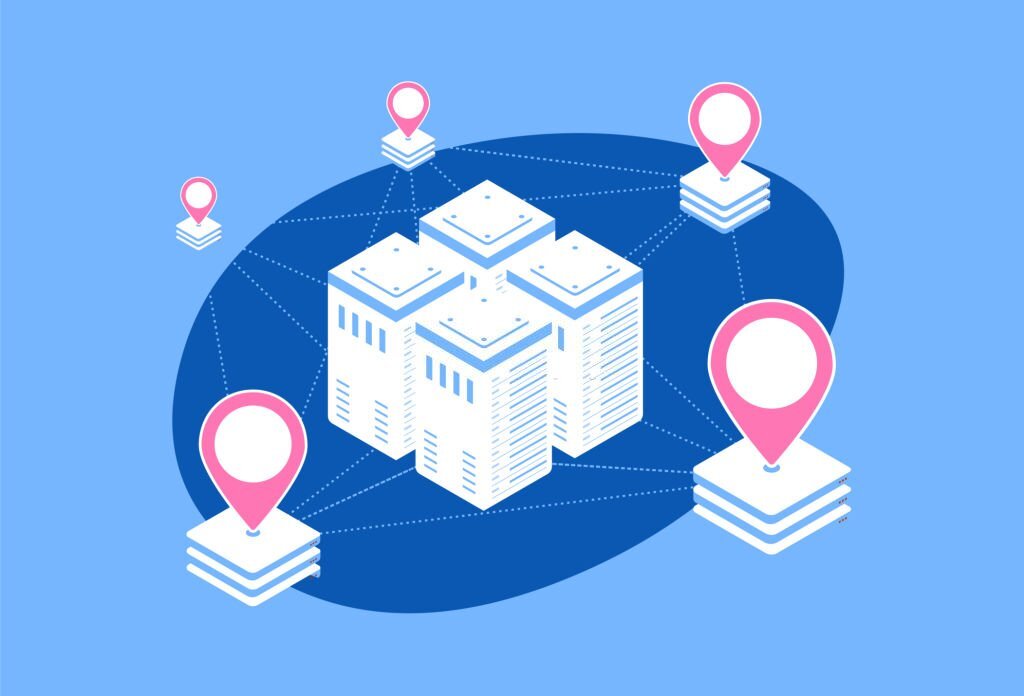
A CDN is a network of servers located in various geographic locations that work together to deliver content to users based on the user’s location. Traditionally, without a CDN, when a user makes a request for a website, that request is made to the server where that website’s content is hosted and then the website’s content is returned to the user’s browser. This process happens repeatedly for the entire period that a user navigates a website as each request for a new page or resource on that website, is sent to the server for a response. However, sometimes plugin using caching plugins and techniques, static files can be stored in the user’s browser.
The process described above can pose some problems. One of these problems is that repeated requests to the server can reduce server performance as each request adds up to the total usage of server resources. The speed of content delivery from the server to the end user is another problem. The distance between the location of the server and the end user can affect the speed at which the website content is being sent back to the user.
These problems identified above are solved by a CDN. When using a CDN, your website files are stored or “cached” in servers called Point of Presence servers or edge servers therefore instead of fetching content from the origin server each time a user requests a webpage, the CDN selects the server closest to the user and delivers the content from that server. This process can significantly reduce the distance that data must travel, resulting in faster loading times, better website performance, and ultimately a better user experience. In addition, CDNs also reduce the load on the origin server, as fewer requests are made directly to it resulting in lower hosting costs, reduced bandwidth consumption, better server resources management, and overall server performance.
CDNs are especially important for businesses with a global audience. Using a CDN ensures that your website loads quickly for visitors worldwide, no matter where they are located because your website content is cached in multiple server locations across the globe and delivered from the one closest to the location of the end user.
Benefits of Using a CDN
- Improved website performance: As mentioned earlier, using a CDN can improve website performance by reducing loading times and increasing page speed.
- Increased reliability and website uptime: CDNs can improve website reliability and guarantee better website uptime since website content that have be cached can be served from the CDN servers even when the origin server is inaccessible or unavailable.
- Better user experience: Faster loading times and improved website performance can lead to a better user experience, which can increase engagement and reduce bounce rates.
- Improved SEO: Site speed is one of the factors considered by search engines for ranking sites. Therefore using a CDN can potentially contribute to improving your search engine rankings.
How to Integrate with CloudFlare CDN
Cloudflare is one of the most popular CDN providers. It offers a wide range of features designed to improve website performance and security. In addition to its CDN services, Cloudflare also provides website security by offering a SSL/TLS encryption service, DDoS ( Distributed Denial of Service) protection, and content optimization tools. The best part is that you can get all these features for free. Learn how to make use of Cloudflare by following the steps below.
- Sign Up for a Cloudflare Account
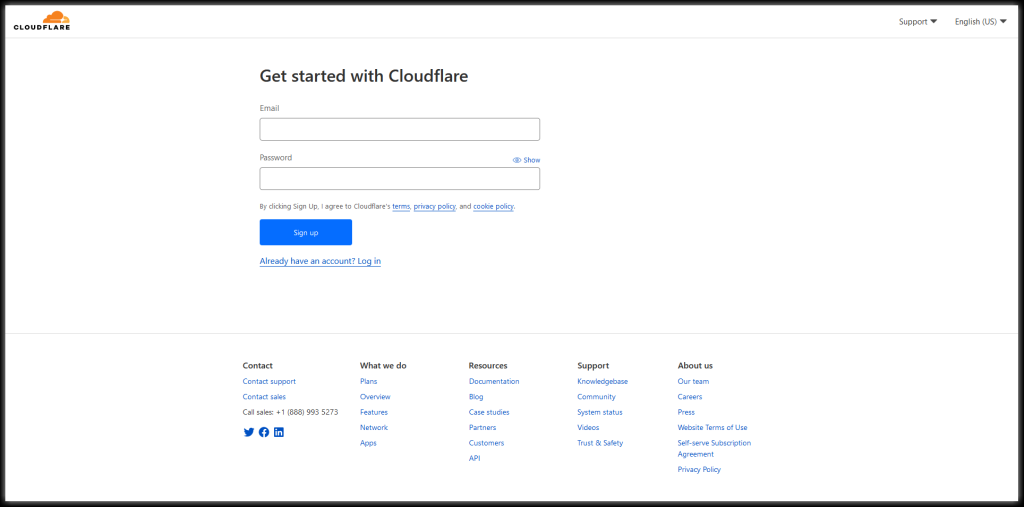
The first step is to sign up for Cloudflare. Go to the Cloudflare website by visiting www.cloudflare.com and click on the “Get Started Free” button in the hero section as shown in the image below.

On the next page that should look like the image below, enter your email address and password, then click on the signup button to create your account.
2. Add your website to Cloudflare
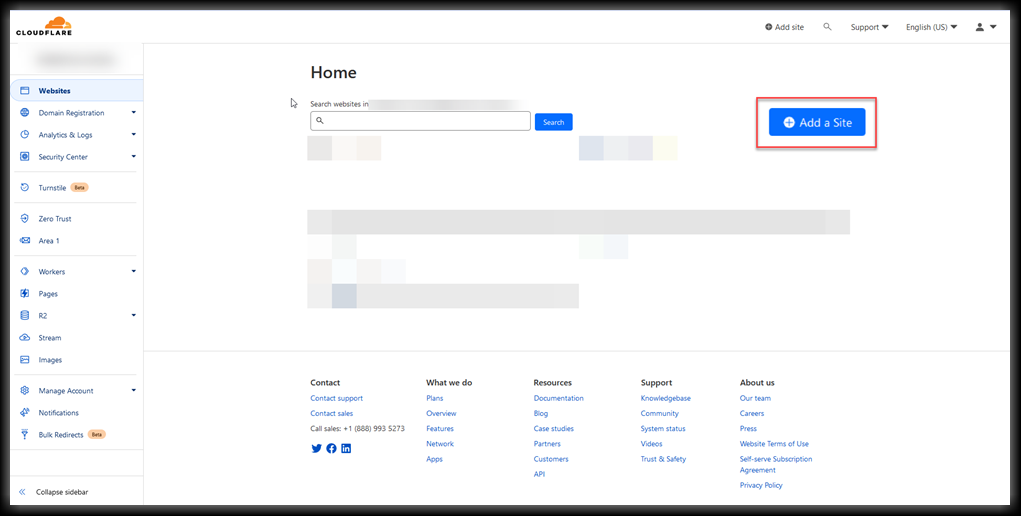
After creating your account, you will be able to add your website to Cloudflare by clicking the blue “Add a Site” button as shown in the image below.
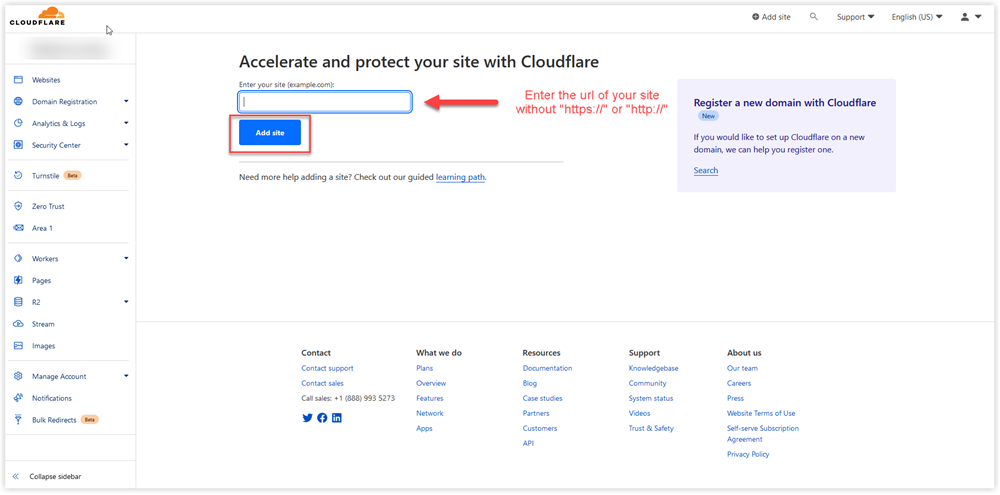
on the next page that looks as shown below, input your site URL.
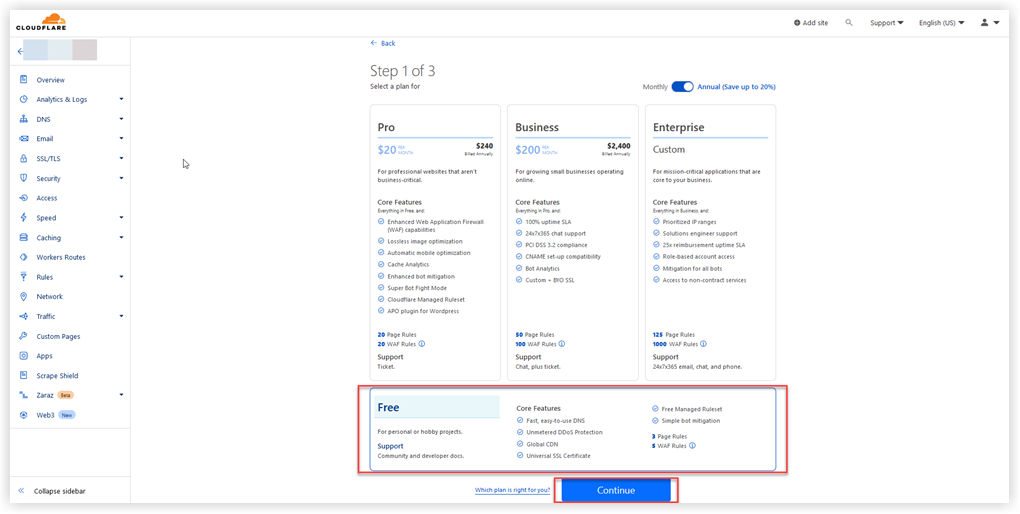
After inputting your URL, you will be required to choose a plan. Although Cloudflare offers paid plans, the free plan is usually enough to improve your website performance. Feel free to select a paid one if you require other paid services they provide. Then click the “Continue” button.
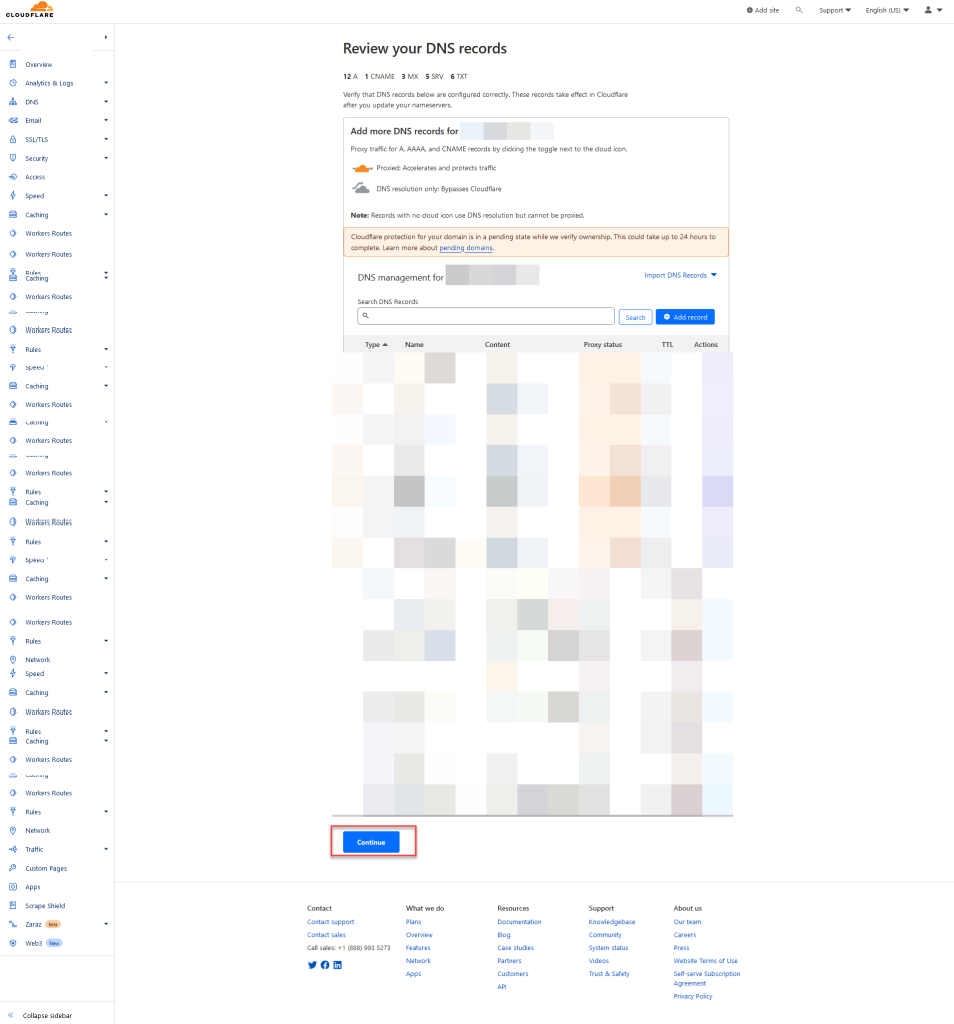
Cloudflare will scan your DNS records and import them automatically. To proceed, click the “Continue” button on the page.
3. Update Your Domain’s Nameservers
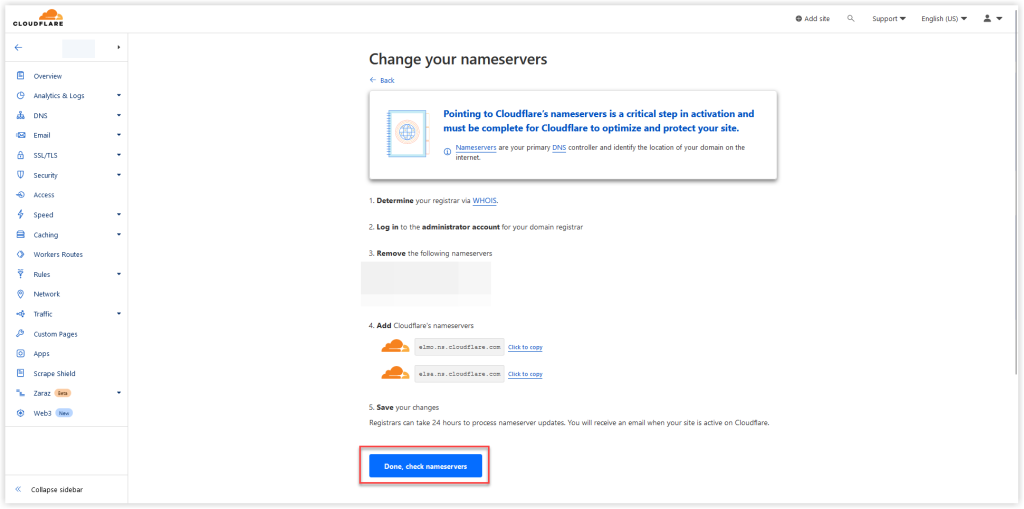
After selecting a plan, you will be required to change your domain’s nameservers to that of Cloudflare. Cloudflare usually provides you with two nameservers to use for your website. Once you are done, you can verify it has been changed by clicking on the “Done, check nameservers” button. The procedure for changing your nameservers can vary depending on your host provider. Click any of the providers below to see an instruction on how to go about changing nameservers for their domains.
4. Configure Cloudflare Settings
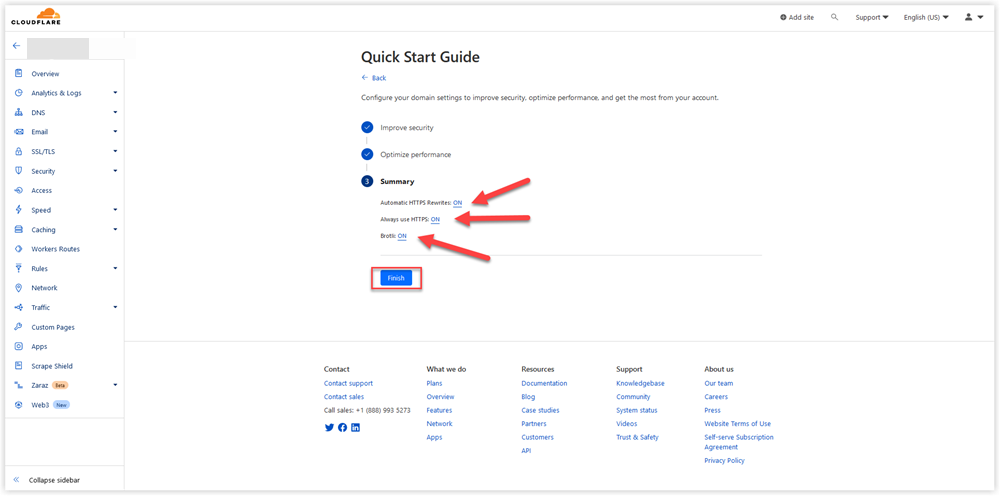
Once your site has been successfully added to Cloudflare, you should get a mail and a page like the one below. Click on the “Review Setting” button to configure Cloudflare with optimal settings per your needs

Ensure that Automatic HTTPS Rewrites, Always use HTTPS, and Brotli are all turned ON as shown in the image below
5. Test your website
After configuring Cloudflare settings, it’s essential to test your website to ensure everything is working correctly. You can use a website speed test tool like GT Metrix to verify that your website is loading quickly. You can also use a tool like DNS checker to verify that your website uses Cloudflare servers.
By following the steps above, you can successfully leverage the powerful features of Cloudflare to improve your website’s performance. Thankfully, they also have a WordPress plugin that can be used to easily manage Cloudflare’s configuration right from your WordPress dashboard. You can find the instructions on how to install this plugin here
It is also important to state that a common issue that arises after changing nameservers to Cloudflare is email deliverability issue. Therefore ensure that the MX records for your domain, imported by Cloudflare, are correct.
Conclusion
Using a CDN like Cloudflare can significantly improve website performance, reliability, and user experience. By following the step-by-step guide provided in this article, you can easily integrate Cloudflare CDN with your WordPress website and start enjoying the benefits of faster loading times and improved website performance.


This was very informative. Thank you
Chef!!!